
Last updated September 13, 2026
A film color overlay is a layered video asset placed over digital footage to simulate analog textures like grain, light leaks, and vintage tints. By adjusting blending modes to ‘Overlay’ or ‘Soft Light’ in editors like Premiere Pro, you introduce organic imperfections that bridge the gap between digital sharpness and cinematic warmth.
Key takeaways
- Select 35mm grain. Use this for high-end commercial polish or 8mm for nostalgic, textured brand storytelling.
- Order of operations. Apply overlays after color correction but before final color grading to ensure texture interacts with the intended palette.
- Optimize blending. Use ‘Overlay’ or ‘Soft Light’ blending modes for subtle texture and ‘Screen’ for light leaks and film burns.
- The Logical Twist. Balance digital clarity with analog warmth to maintain modern brand trust and professional quality.
- Control intensity. Keep opacity levels at a subtle range to prevent grain from appearing as digital noise.
Prerequisites for Cinematic Color Workflows
To achieve a professional look, you need an NLE that supports layered tracks and complex math-based blending (think Adobe Premiere Pro, Final Cut Pro, or DaVinci Resolve). The raw assets required typically include high-quality 4K film grain overlays (FGO), light leak clips, and color-matched LUTs that serve as a base for your grade. The time required to texture a commercial sequence depends on the complexity of the transitions and the variety of the shots.
Costs vary significantly. You might find free open-source grain clips, but we prefer premium professional texture packs that offer high-resolution scans of real celluloid. In our work throughout San Diego, we frequently select specific overlays to complement the natural golden hour warmth found at locations like Sunset Cliffs or the historic textures of Old Town. Using these tools allows us to marry the sharpness of modern sensors with the evocative feel of traditional cinema. It works.
1. Import your film texture assets
Start by bringing your film grain and color overlay files into your project media bin alongside your primary raw footage. Organization is key at this stage. We recommend sorting your assets by "era," such as 16mm for a gritty documentary feel or 35mm for clean corporate films. Don’t hunt for files. This setup ensures you can pivot quickly from a crisp interview to a textured B-roll sequence without losing momentum.
Practical Rule: Match your film grain overlays to the appropriate scale of your project. Adjusting texture files improperly can create digital aliasing that ruins the analog illusion.
Ensure the overlay resolution matches your sequence settings. If you are working in a 4K timeline, using a 1080p grain file will lead to soft, muddy textures. It looks like a mistake. We often pre-sort light leaks and dust scratches into a dedicated folder. This facilitates quick access during high-energy transition points in a short film narrative where the pace is fast.
2. Align the overlay on the timeline
Place your film color overlay on the video track directly above your primary footage, typically on Track V2 or V3. You should trim the overlay to match the specific clip length. If the overlay is a shorter loop, use a ripple edit to repeat it across longer narrative sequences. This layering approach is essential because Wevideo to digital video, making it feel more organic and less "perfect."
Follow industry standards: Wevideo and adjust the blend mode or opacity of the top layer. At Pretzel Logic, we always apply the overlay after the initial color correction. Underlying exposure and white balance must be perfected before the texture is introduced. We often use heavier textures during emotional story beats or flashbacks. It signals a shift in time or mood to the viewer.
3. Configure video blending modes
Select a video blending mode by accessing the opacity or transparency settings in your editor to define how the top layer calculates color values against the bottom layer. These mathematical formulas, often found in the effect controls of Adobe Premiere Pro or Final Cut Pro (FCPX), allow light from the original footage to pass through the texture. Choosing the right mode prevents the overlay from simply blocking the primary image. It allows the texture to react to the brightness and color of the scene.
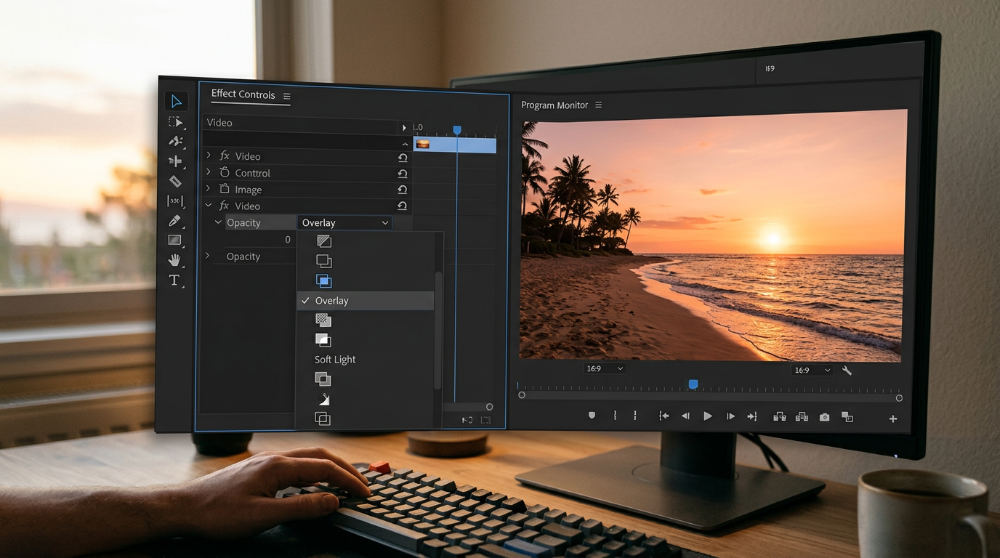
Navigate to the "Effect Controls" or "Inspector" panel in your software to change the blend mode, which determines how the pixels of the overlay interact with the footage beneath. For a standard cinematic look, selecting "Overlay" provides a balanced increase in contrast and texture. If you want a more subtle integration that preserves highlight details and prevents the blacks from becoming too crushed, switch to the "Soft Light" mode.
- Screen mode. Use this specifically for light leaks and film burns to drop out the black background while keeping the colorful light artifacts visible.
- Linear Light. This is a more aggressive mode used when you want the film texture to heavily dictate the final color palette of the scene.
- Hard Mix. Experiment with this for high-contrast, stylized music videos or experimental TV spots where the digital source needs to be obscured.
- Multiply. Occasionally useful if you are applying a light-colored wash or a specific vintage tint to a bright daytime scene.
DaVinci Resolve offers advanced node-based blending for those seeking the highest level of control. It isolates textures to specific frequency ranges. This is particularly helpful when you want grain in the mid-tones but need to keep the deep shadows clean.
4. Adjust opacity for the Logical Twist
The most critical step in professional texturing is lowering the opacity slider. You need to find the "sweet spot" where the grain is felt rather than explicitly seen. We practice what we call the Pretzel Logic "Logical Twist." This involves maintaining 4K digital sharpness while adding just enough analog grit to make the content feel human and approachable. We pick this balanced approach every time because it builds brand trust. In high-stakes corporate films production, quality is paramount.
Watch Out: If your grain looks like static, your opacity is likely too high. Professional cinematic grain should be a subconscious texture, not a dominant visual layer.
Check your shadow areas during this step. Ensure the grain isn’t creating muddy blacks or losing essential detail. If the color tint of a specific film color overlay is too strong for the brand’s guidelines, you can use a mask to apply the overlay only to specific regions of the frame. This allows the center of the image to stay clean while the edges retain a vintage vignette.
5. Key out undesired color casts
Remove undesired color casts by using a chroma key or Luma Key tool to target and delete specific hues or brightness levels within your overlay file. This technique is vital when you have a 16mm film aesthetic clip that contains beautiful scratches but an unwanted yellow tint. By isolating the alpha channel, you can preserve the physical texture of the silver halide crystals. You maintain the precise color temperature of your original digital capture.
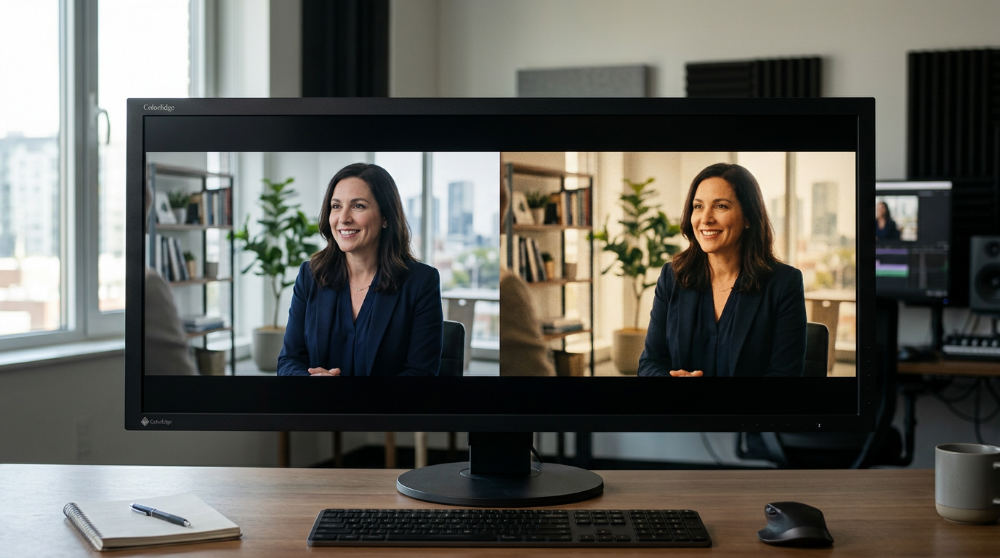
Use a Luma Key or Ultra Key if your overlay contains specific color artifacts that clash with your brand palette. This is common when using "dirty" film scans that might have yellow or green tints. Those don’t match the cool, professional blues of a legal or medical video. By keying out these casts, you retain the physical texture of the dust and scratches without compromising the intentional color grade.
- Consistency check. Match the grain intensity across different shots to maintain a cohesive visual language throughout the project.
- Fine-tuning. Adjust the high-contrast areas to ensure the film grain doesn’t look like digital noise during the final compression and export.
- Professional integration. We integrate these textures during our professional color grading and correction services to ensure the final product looks like a single, unified piece of film.
- Temporal noise. Ensure the grain is moving; static grain looks like a dirty sensor and will immediately break the cinematic illusion.
Limitations of Film Overlays in San Diego Commercials
Overlays are powerful, but over-saturation of grain can distract from the message in professional marketing content. We find that 8mm (Super 8) textures are often too aggressive for luxury real estate or high-end legal branding in San Diego. A cleaner 35mm look is usually preferred. Excessive light leaks can also feel amateurish if they aren’t motivated by the actual lighting present in the scene. A sun flare coming from the wrong side of the frame is a dead giveaway.
Technical limitations apply. High-bitrate overlays significantly increase export times and final file sizes. This can be a hurdle for mobile-first social media campaigns. It is also a common misconception that overlays can "fix" poorly shot footage. They can’t. If a scene is out of focus or badly lit, adding grain will only emphasize the flaws. In such cases, we recommend our professional services to improve the base quality before applying stylistic textures.
Common Mistakes to Avoid With Film Textures
One of the most frequent errors is leaving the blending mode on "Normal." This simply blocks the footage beneath and renders the overlay useless. Another mistake is applying grain before color correction. This leads to unnatural color shifts in the texture itself. Forgetting to match the grain speed to your sequence frame rate is also a major pitfall. It causes a jittery "strobing" effect that is physically uncomfortable for the viewer to watch.
Ignoring the psychological impact of color is another risk. A cold blue film tint can accidentally make a warm San Diego beach shoot feel uninviting and sterile. To avoid these issues, we emphasize the importance of mastering the post production film workflow early in the project timeline. Planning for these effects during the storyboarding phase ensures the final texture supports the narrative. Incorporating retro video production elements works best when the 16mm film aesthetic is part of the original design.
If you are looking for a team that understands how to blend modern technology with classic storytelling, we can help you build a visual identity that stands out. You can learn more about how we bring your creative vision to life through our full-service production and editing capabilities. We bring the twist.
FAQ
1. What is a film color overlay?
It is a video file containing film artifacts like grain or light leaks placed over digital footage to create an analog aesthetic.
2. Which blending mode is best for film grain?
"Overlay" or "Soft Light" are standard choices for grain, while "Screen" works best for light leaks.
3. Does film grain affect video quality?
When used correctly, it adds perceived detail. If the opacity is too high or the resolution is low, it can introduce distracting digital noise.
4. Can I use overlays in mobile editing apps?
Yes, as long as the app supports multiple video layers and blending modes, you can apply these textures.
5. Where should I place the overlay in my edit?
Apply it after color correction but before the final grade to ensure the texture blends naturally with your colors.