
Last updated September 10, 2026
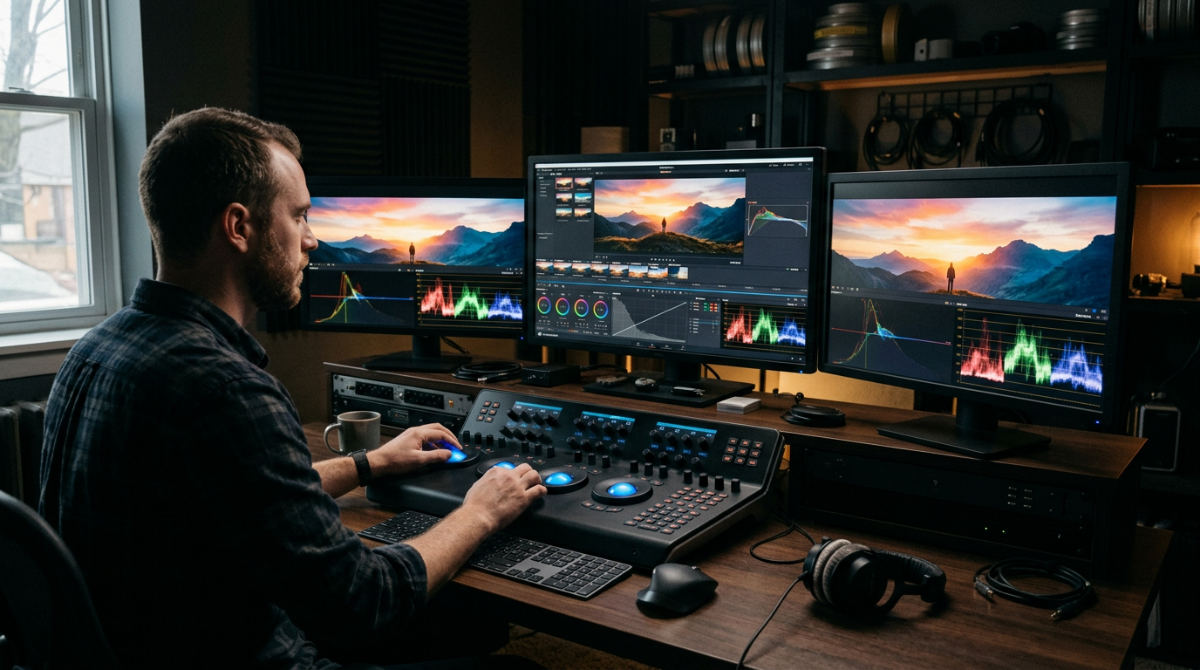
Professional color grading software, such as DaVinci Resolve and Baselight, allows colorists to manipulate hue, saturation, and luminance with precision. These tools utilize 32-bit float processing and node-based workflows to enhance emotional storytelling, match shots across diverse lighting conditions, and ensure high-quality output for broadcast, cinema, and digital platforms.
Key takeaways
- Industry Standard. DaVinci Resolve remains the industry standard due to its 32-bit float image processing and advanced node-based architecture.
- Workflow Flexibility. Node-based grading offers significantly more flexibility than layer-based systems for complex primary and secondary corrections.
- Hardware Demands. Professional grading requires specialized GPU hardware to handle real-time rendering of high-bitrate raw video files.
- Manual Precision. LUTs serve as mathematical starting points, but true grading involves manual adjustments to maintain creative consistency.
- Psychological Impact. Color choice directly impacts viewer psychology, such as using specific palettes to make food in restaurant commercials look appetizing.
The Evolution of Modern Color Grading Tools
The transition from $100,000 hardware suites to accessible software like DaVinci Resolve has democratized professional aesthetics. Boutique studios now compete with major post-houses. Blackmagic Design leads with 32-bit float image processing, ensuring zero data loss during aggressive color manipulation. This is critical. You need it when pushing a shot from a flat log profile to a high-contrast cinematic look. High-end systems like Baselight remain the bedrock for Hollywood theatrical releases by offering unmatched precision for large-scale projection, yet the gap between entry-level and elite tools has never been smaller.
At Pretzel Logic, we view software as the final 20% of the journey. Integrated pre-production planning determines the ultimate visual success before a single frame is graded. You can have the most expensive software in the world. It won’t matter if the lighting on set doesn’t support the intended palette. The tools can only do so much. Modern workflows now prioritize HDR color wheels to handle the expanded dynamic range of current display technologies. This ensures highlights and shadows retain detail on everything from an OLED television to a smartphone.
We prefer this evolution. It means we can spend more time on the creative "why" rather than the technical "how." By utilizing these advanced tools within our software for post production, we focus on delivering a visionary workflow that bridges the gap between raw data and emotional resonance.
Understanding Node-Based vs Layer-Based Workflows
Node-based grading is a non-linear method of processing image data. It allows colorists to branch, combine, and blend adjustments independently rather than in a fixed vertical stack. This architecture is essential for complex shot matching and intricate look development. Unlike a linear stack, nodes can be reordered without destructive consequences. Layer-based systems, like Adobe Premiere Pro’s Lumetri panel, are intuitive for editors because they mimic Photoshop logic. However, they limit the depth of secondary corrections when you need to isolate multiple elements simultaneously.
Nodes facilitate advanced object tracking and facial retouching without affecting the global primary grade of the clip. You can brighten a lead actor’s eyes while independently cooling down the background shadows. Our "Logical Collaborator" approach at Pretzel Logic bridges these technical node constraints with your creative concepts for a polished finish. We don’t just click buttons. We build a logical map of your story’s visual progression. Software like CineDream has even introduced direct on-screen grading. Colorists click and drag the image itself rather than using sliders, which blurs the line between the artist and the digital canvas.
Speed matters. When managing high-volume campaigns, the choice between these workflows impacts how quickly we can iterate. Our post-production services often utilize node structures to ensure that a specific brand color remains perfectly consistent across twenty different shots, even if those shots were filmed hours apart in changing sunlight.
Prerequisites for Professional Color Work
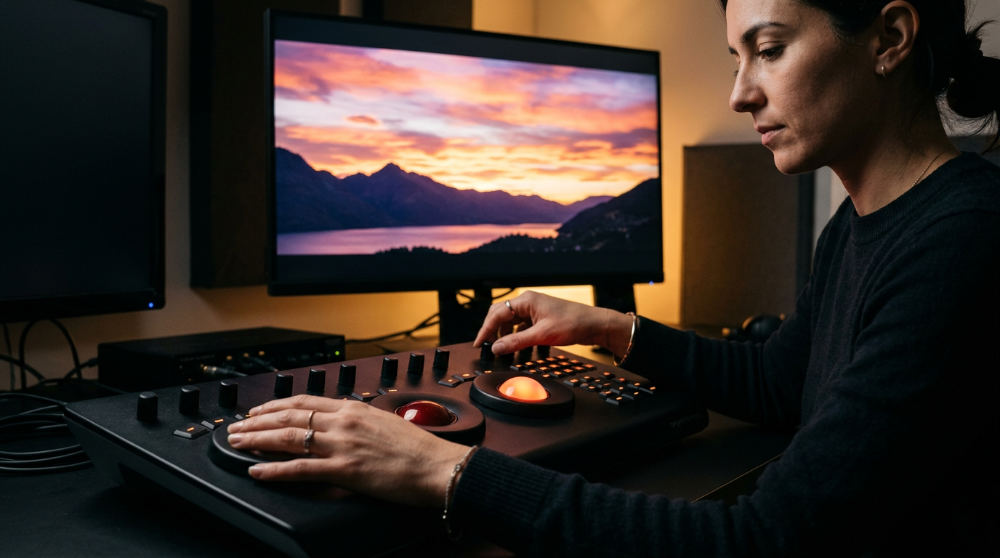
High-end color work requires a calibrated monitoring environment, a dedicated GPU for real-time rendering, and a control surface to manipulate multiple parameters simultaneously. Professional color work requires a significant time investment to ensure consistency across every frame. This isn’t just about making one frame look pretty. It is about ensuring the transition between shot A and shot B is invisible to the viewer’s subconscious. While software may be affordable, a professional-grade GPU and a calibrated 10-bit monitor are non-negotiable for accuracy. Consumer screens often provide inaccurate contrast or color shifts.
We believe success depends on a robust framework that aligns color with sound, motion graphics, and pace. Using a hardware control panel increases throughput and precision compared to mouse-and-keyboard interactions. A colorist can adjust lift, gamma, and gain simultaneously. Authentic color grading begins with a storyboard that dictates the mood before a single pixel is captured. If the plan calls for a "noir" aesthetic, the lighting on set must provide the necessary shadows for the software to enhance later.
- Calibrated Monitoring. A dedicated decklink card and a professional reference display ensure you see the true signal.
- High-Speed Storage. Reading high-resolution RAW files in real-time requires high-speed storage solutions or robust RAID systems.
- Creative Strategy. The grade should follow the emotional arc defined during the pre-production planning phase.
1. Import and organize media in a color-managed workspace
Set your project to a wide gamut color space to preserve all captured sensor data from the start. This prevents the software from "clipping" information you might need later. We utilize DaVinci Wide Gamut or similar intermediate spaces to ensure that footage from different cameras (like an Arri Alexa and a RED V-Raptor) can live harmoniously in the same timeline.
Organize clips by scene and lighting conditions to streamline the application of shared grades later. We often use "groups" or "remote grades" so that any change made to one clip in a scene automatically ripples through the rest of the sequence. Check your power. Ensure your software is utilizing the full power of your GPU for real-time playback of high-resolution RAW footage. Verify that all frame rates and resolutions match your delivery requirements for broadcast or social standards.
2. Apply primary color correction to neutralize the image
Adjust exposure and white balance to create a clean, natural baseline across all shots before you attempt any creative "look" development. This step is about technical accuracy. You are making sure whites are white and blacks are black. Utilize scopes, specifically the waveform and vectorscope, to ensure legal signal levels for broadcast and to catch color casts that your eyes might miss due to fatigue.
Correct for any tint or temperature shifts introduced by varying light sources on set, such as a rogue fluorescent light in the background of a daylight-balanced scene. Balance the black and white points to maximize the dynamic range without clipping essential details in the highlights or crushing the shadows into noise. By establishing this neutral ground, you ensure that the creative grade applied in the next steps behaves predictably across the entire project.
3. Perform secondary corrections to guide the viewers eye

Secondary color correction involves using masks, qualifiers, and power windows to isolate specific areas of the frame for targeted adjustments. Use power windows or masks to isolate specific elements like a brand’s product or a speaker’s face. This allows you to draw the viewer’s attention exactly where the story requires. We often apply skin tone qualifiers to ensure human subjects look natural regardless of the stylistic grade applied to the environment. If the background is a stylized teal, the skin tones must still look healthy and vibrant to maintain a sense of reality.
Execute "The San Diego Twist" by enhancing natural light to capture that vibrant, Southern California aesthetic for premium brands. This makes the footage feel sun-drenched and aspirational. Track moving objects within the software to maintain consistent isolation throughout the duration of the clip. Modern AI trackers in davinci resolve color features make it possible to lock a mask onto a moving car or a walking person with incredible precision. This targeted approach turns a flat recording into a dynamic visual experience.
4. Craft the creative look and match shots for consistency
Develop a signature palette that reinforces the brand’s emotional narrative and visual identity. This could be the high-contrast look of a luxury real estate video or the warm, inviting tones of a restaurant commercial. Employ AI-driven tools like Colourlab.ai to assist in balancing color across different camera systems, significantly reducing the time spent on manual shot matching. Apply film emulation plugins sparingly to add organic texture and grain that mimics traditional celluloid. This gives digital footage a more "expensive" and tactile feel.
Look at everything. Compare shots side-by-side in the viewer to ensure the sequence feels like a unified visual experience. We often use a "hero shot" as a reference and match every other clip in the scene to that specific anchor. This consistency is what separates amateur video from professional cinematography. For projects requiring a bilingual reach, working with a partner like InnoVision Marketing Group ensures the marketing conversion goals are met by maintaining a high standard of visual excellence across all demographics.
5. Export for specific delivery requirements
Choose the appropriate codec and bit-depth for your final platform, whether it is 10-bit 4K HDR for television or compressed H.265 formats for social media. Delivering for multiple aspect ratios is standard. Ensure your framing and color remain impactful in both 16:9 and 9:16 formats. Perform a final quality check on a calibrated monitor to ensure no artifacts or banding were introduced during the grading process.
Include metadata tags for color space and gamma (such as Rec.709 or Rec.2020) so the video displays correctly on all consumer devices, from iPhones to high-end home theaters. Finally, archive the project files including the color nodes. This allows for the revitalization of existing client footage in the future. We can re-open an old project and update the look to match modern trends without re-shooting.
Common Mistakes in Video Color Grading
Over-relying on LUTs is a rookie move. Mathematical formulas are a starting point, not a substitute for professional color grading and correction services. A LUT applied to underexposed footage will look vastly different than the same LUT applied to overexposed footage. Ignoring the scopes is another pitfall. Relying solely on your eyes can lead to inconsistent results due to eye fatigue or uncalibrated monitors that don’t reflect the true image data.
- Crushing Blacks. Pushing shadows too far can result in "muddy" footage that loses all detail in darker regions.
- Mismatched Skin Tones. Viewers are hypersensitive to unnatural skin colors. Consistency here is the hallmark of professional post-production.
- Neglecting the Environment. Failing to account for the viewing environment (bright phones vs. dark theaters) can ruin the intended impact.
- Over-Saturation. Pushing colors beyond the "broadcast safe" limits can cause bleeding and technical rejection from TV networks.
Choosing the Right Workflow for Your Brand
Select software that supports collaborative logical workflows, especially when managing large-scale national campaigns. The right tool depends on your specific industry needs. Law firms require clinical clarity and sharp contrast to convey authority. Restaurants need warm, appetizing hues that stimulate the senses. Software is just a tool. The visionary execution comes from a team that understands how to translate concepts to the screen through a comprehensive video production workflow.
Focus on long-term value by choosing a platform that allows for easy updates and revitalization of your video assets. As technology changes, having your content built on industry-standard platforms ensures it remains accessible and adaptable. At Pretzel Logic, we combine these technical tools with a unique creative perspective to ensure your brand doesn’t just look good, but tells a story that sticks.
If you are ready to take your project from a raw file to a cinematic masterpiece, we are here to help you navigate every step of the process. You can contact us by reaching out to our team of specialists today.
Frequently asked questions
What is the best color grading software for professional video?
DaVinci Resolve is widely considered the industry standard for its node-based workflow and 32-bit float processing. Baselight is the go-to for high-end Hollywood theatrical productions requiring massive throughput, while Adobe Premiere Pro remains popular for integrated editing and light grading via the Lumetri panel. The best choice depends on whether you need deep technical control or a fast, integrated editing experience.
Is DaVinci Resolve better than Premiere Pro for color?
Resolve offers a more robust node-based architecture, allowing for deeper layered corrections without degrading the signal. Premiere Pro is often faster for quick edits, but lacks the specialized precision tools found in Resolve’s color page, such as advanced HDR wheels and 3D qualifiers. Professional colorists almost exclusively prefer Resolve for its advanced tracking and secondary qualification capabilities.
Do I need a specialized GPU to run professional color grading software?
Yes, color grading is highly GPU-intensive, especially when working with high-resolution RAW footage. Sufficient VRAM is required for stable performance in modern software versions to handle complex node trees. Dedicated hardware acceleration significantly reduces render times and enables real-time playback, which is essential for accurate creative decision-making during the grading process.
What is the difference between a LUT and a color grade?
A LUT is a fixed mathematical preset that maps one color value to another, often used for technical conversion between color spaces. A color grade is a custom, manual process that involves creative decisions to enhance a specific story’s mood through primary and secondary adjustments. Relying only on LUTs results in a generic look, whereas a grade provides a tailored, professional finish.
Can I use Photoshop for video color grading?
While Photoshop can edit video frames, it lacks the timeline performance and motion-tracking tools necessary for professional video grading. It is unsuitable for maintaining consistency across thousands of frames in a video clip. Dedicated video software like Resolve or Premiere Pro is much more efficient for modern post-production workflows, offering real-time playback and tools built specifically for moving images.