
Last updated September 13, 2026
Navigating the landscape of screen capture software requires moving beyond basic recordings to find tools that enable professional storytelling. This guide explores data-backed techniques, from high-bitrate codecs to motion graphics integration, sourced from industry-standard workflows to help you bridge the gap between simple captures and high-end commercial video production.
Direct Answer: How do you optimize screen capture for professional video production?
To achieve professional-grade results, you must record in native resolution with high-bitrate codecs (like Apple ProRes) to preserve color data. Success hinges on a recording environment where desktop clutter is minimized and UI scaling is increased for clarity. Integrating metadata like keystroke visualization and mouse-click tracking reduces cognitive load for viewers, while syncing external XLR audio hardware ensures the sound quality matches the high-definition visuals.
Key Takeaways
- Prioritize Fidelity: Use high-bitrate recordings to allow for professional color grading without pixelation.
- Scale for Legibility: Boost your OS UI scaling before recording to ensure menus remain sharp on 4K displays.
- Metadata Matters: Enable click-tracking and keystroke overlays to make technical tutorials intuitive.
- Clean the Frame: Hide desktop icons and system docks to keep the audience focused on the content.
- Sync Audio Externally: Use dedicated audio interfaces rather than built-in laptop microphones to maintain authority.
1. Prioritize tools that support high-bitrate recording to preserve color data for professional grading.
If you want your videos to stand out in a saturated digital market, you cannot settle for the "muddy" look of standard recordings. Professional screen capture software must support high-bitrate recording, specifically formats like Apple ProRes or high-bitrate H.264. These codecs capture a vast amount of color information that typical compression loses. Utilizing high-fidelity capture ensures your marketing videos maintain a professional look even on massive 4K displays.
When we handle professional color grading at Pretzel Logic, we often see how low-bitrate captures "break" or pixelate when you try to adjust shadows or highlights. This technical foundation is what allows for a truly thought-provoking visual story. By capturing more data at the source, you give your post-production team the flexibility to manipulate the image without it falling apart into blocky artifacts. This is the difference between a generic recording and a piece of high-end commercial content.
2. Bridge the gap with hybrid capture-to-editor software for an all-in-one production workflow.
Hybrid tools offer an integrated environment where the capture engine and timeline editor share a unified color space and metadata protocol. For businesses that need to produce high volumes of content without maintaining a massive internal post-production department, tools like TechSmith Camtasia are essential. They allow you to record your screen and immediately move those clips into a timeline within the same interface. This removes the friction of exporting and re-importing files between disparate programs.
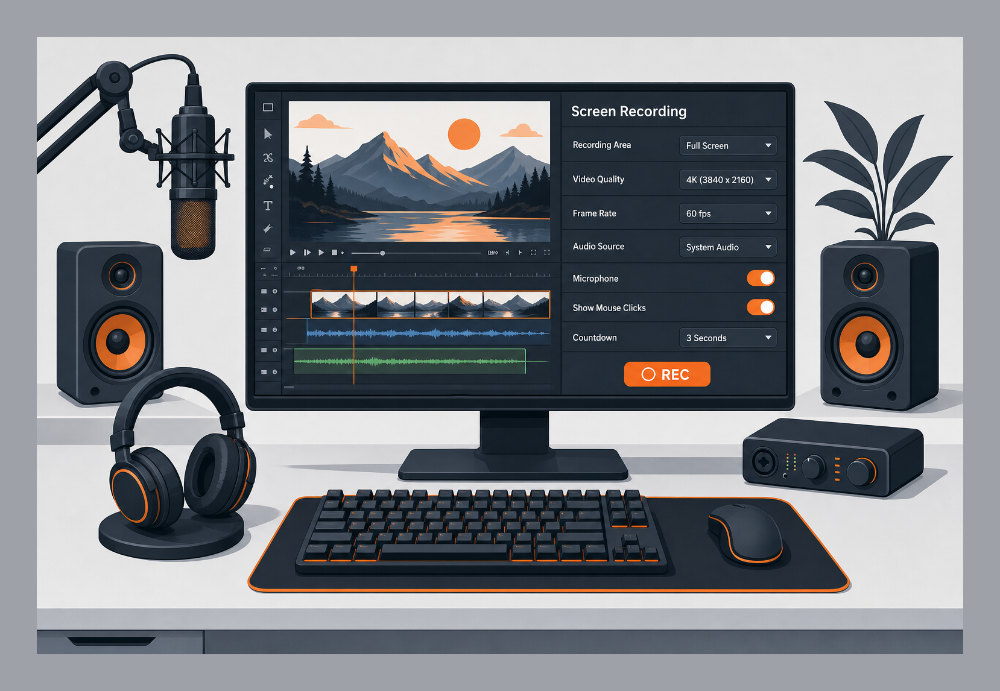
These platforms often support motion graphics integration, allowing you to add professional text overlays and callouts without leaving the tool. This is a logical workflow for teams that need to turn concepts into finished assets quickly. While we specialize in full-scale video production, we recognize that speed is often a priority for internal corporate updates. Using a hybrid system ensures that your visual output remains cohesive and polished while significantly shortening the time it takes to get from the record button to a finished file.
3. Record in native resolution to avoid scaling artifacts during the final edit.
One of the most common mistakes in screen recording is capturing at 720p when the target delivery is 1080p or 4K. This results in immediate blurriness that no amount of post-processing can truly fix. To maintain technical excellence, always record in your display’s native resolution. High resolution can make text and icons look tiny, though. The pro move here is to scale your operating system’s UI before you hit record. Proper scaling helps prevent visual distortions while keeping details sharp.
This ensures that your icons and menu bars remain sharp and legible when captured, rather than looking like tiny, aliased pixels. Native resolution capture is the absolute baseline for moving from a simple concept to a screen-ready masterpiece. By starting with the highest possible pixel count, you ensure that any subsequent video editing maintains the crispness expected by modern audiences. It creates a professional foundation that reflects the high standards of your brand.
4. Utilize open-source ecosystems for complex, multi-source video capture without licensing fees.
When your production requires multi-window layouts, real-time scene switching, or multiple camera inputs, a standard "record" button isn’t enough. Open-source ecosystems bundle high-end utilities specifically for creators. A centerpiece of this stack is OBS Studio, which allows for sophisticated scene composition. You can layer your screen, a webcam, and branded graphics in real-time, essentially acting as a live television director for your own capture. This flexibility is critical for complex technical demonstrations.
To achieve a professional-grade technical stack, you should integrate Jack Audio with your screen capture. This allows for low-latency sound routing, ensuring your voiceover and system audio stay perfectly synced. This level of control is typically reserved for expensive proprietary suites, but the open-source community offers it for free to those willing to learn the logic of the workflow. It provides a level of versatility that is perfect for technical demonstrations where you need to show multiple moving parts at once.
5. Integrate frame-by-frame precision for stop-motion workflows to ensure absolute visual consistency.
Stop-motion capture requires software that can control hardware shutters and digital capture interfaces with microsecond timing to prevent frame flickering. For these specialized workflows, professional tools like Dragonframe are often utilized. This software can be used for various animation styles, providing the control necessary to translate high-resolution stills into fluid, intentional motion. This is especially useful for creating "explainer" videos that have a unique, hand-crafted aesthetic rather than a sterile digital feel.
The key feature to look for is real-time onionskinning. This allows you to see a transparent ghost of your previous frame while you are capturing the next one, ensuring perfect alignment. Direct camera or software control through the interface eliminates the risk of manual shake, which is the death of professional stop-motion. When you want to bring a creative vision to life with a twist, these precision-based tools provide the consistency needed for a polished final product that captivates the viewer’s attention.
6. Enable mouse-click tracking and keystroke visualization to enhance instructional clarity.
The best screen capture software for video tutorials isn’t just about the video feed. It is about the metadata. When teaching a complex software process, your audience needs to know exactly what you are doing with your hands. Enabling mouse-click tracking, where a colored ring or ripple appears around the cursor on every click, reduces the need for lengthy verbal explanations. Visual cues help the viewer follow the logic of your actions.
Similarly, keystroke visualization displays the shortcuts you are using in the corner of the frame. This reduces cognitive load, as the viewer doesn’t have to guess how you just opened a new menu or duplicated a layer. By using these cursor effects, you turn a confusing technical demonstration into a clear, guided journey. At Pretzel Logic, we believe every frame should serve a purpose, and these visual aids ensure that your message is never lost in a sea of unexplained clicks and movements.
7. Choose capture software that allows for ‘clean’ output by hiding desktop clutter automatically.
Nothing breaks the immersion of a professional video faster than a desktop littered with random folders, personal files, or a cluttered dock. High-end screen capture software often includes a feature to temporarily hide icons and system bars during an active recording session. This creates a "sterile" environment that keeps the viewer’s focus entirely on the application being demonstrated. If your software lacks this, use region-selection tools to crop the interface precisely to the active window.
Maintaining a clean visual environment is a direct reflection of the high-level conceptual quality of your brand. It signals to the viewer that every detail has been considered. You might be producing an internal training video or a public-facing commercial. Either way, removing these distractions allows your narrative to breathe. This attention to detail is a hallmark of our approach to professional video production, where we ensure the final product is as sleek and professional as the brand it represents.
8. Use mobile-mirroring capture software for high-fidelity app demonstrations.
In a mobile-first world, capturing high-quality footage of a smartphone interface is a frequent requirement. Rather than trying to film a phone with a physical camera (which often results in glare and moiré patterns) use mirroring tools to cast your phone screen to your desktop. This setup gives you far more control over the frame rate and resolution.
Capturing mobile interactions this way allows you to demonstrate smooth UX/UI transitions at 60 frames per second, ensuring the app looks as responsive as it feels. This ensures your mobile marketing videos look as polished as your corporate promos. If your brand needs to showcase a new digital platform, this mirroring technique is the professional standard. For those looking for a comprehensive strategy, professional marketing groups can help integrate these high-fidelity captures into a broader multi-channel advertising campaign.
9. Synchronize external audio hardware with screen capture for high-quality video tutorials.
While modern screen capture software excels at gathering visual data, the internal microphones on most laptops fail to meet professional standards. High-quality audio is 50% of the viewer experience in instructional video content. If the sound is tinny or echoey, the authority of the lesson is undermined. To solve this, use dedicated audio interfaces and XLR microphones rather than system hardware. This ensures voiceover clarity that matches the high definition of your visual stream.
Before hitting record, always check for system audio versus microphone toggle settings. Incorrect configurations can lead to missing sound layers or the dreaded double-echo effect where the software picks up your voice and the system output simultaneously. Clear, crisp narration allows for a logical flow of information, making the content far more digestible. When we take on a new project, we prioritize this balance between sound and sight to ensure the final output feels like a cohesive, high-end production.
10. Adopt browser-based recorders for lightning-fast feedback loops in remote team environments.
Browser-based capture tools provide an instant, cloud-native way to share screen data without the rendering overhead of traditional desktop applications. Tools like Loom allow you to record walkthroughs of creative concepts quickly. These tools utilize instant cloud uploading, allowing you to share a URL immediately after the recording ends. This is ideal for giving logical feedback on visual drafts without the lengthy rendering times associated with desktop software.
This fast-paced communication method keeps projects moving. Instead of writing long emails to describe a layout change, a thirty-second capture provides total clarity. While these browser tools are perfect for internal collaboration, they serve as a bridge to more formal stages of production. By using these tools to iron out concepts early, teams can save their high-bitrate recording efforts for the final version. Heavy lifting should be reserved for content destined for the public eye.
11. Leverage built-in OS tools for immediate, friction-free capturing without third-party installations.
Sometimes the best tool is the one already installed on your machine. For quick creative drafts and internal concept sharing, native utilities offer excellent stability. Use the macOS Screenshot utility by pressing Cmd+Shift+5 for native recording that retains high system performance. Windows users can utilize the Snipping Tool or the Game Bar (Win+G) to capture high-definition window-specific footage without the overhead of third-party apps.
These tools are built to work with the operating system, meaning you can expect zero software conflicts during the process. While they may lack advanced features like multi-track audio or specialized mouse highlighting, their simplicity is their strength. They provide a friction-free way to capture raw ideas before they are moved into a professional editing environment. Using native tools for the initial capture phase ensures that your system resources are fully dedicated to the task at hand.
12. Select tools with built-in annotation features for rapid post-capture communication.
If you are operating in legal, corporate, or technical environments, the ability to point at specific data points is vital. Selecting screen capture software with built-in annotation features (such as arrows, circles, and text boxes) saves hours in the editing suite. Drawing directly on the capture as you record or immediately after allows you to highlight critical documentation without needing a separate motion graphics pass.
This functionality significantly shortens the logical collaboration cycle between stakeholders. When a reviewer can see exactly which line of code or paragraph of a contract is being discussed, the margin for error disappears. These annotations turn a simple video into a functional document. While these built-in markers are excellent for quick communication, they also serve as a blueprint for professional editors who can later replace these rough sketches with polished, brand-consistent graphics during the final production stages.
Transitioning from Raw Captures to Branded Stories
To truly stand out, you must move beyond the bland corporate look that plagues so many tutorials and demos. This transition starts by integrating your screen captures into a logical production workflow rather than treating them as finished products. When a recording is finished, it should be viewed as raw footage. It is the beginning of a creative process, not the end. By treating your capture as a high-quality asset, you open the door for professional color grading and sophisticated sound design that elevates the entire viewer experience.
Applying high-level creative concepts to your recordings involves layering brand-consistent colors, custom animation, and professional transitions. This approach helps the content feel intentional rather than accidental. Instead of a flat recording of a window, consider how the visual story can be enhanced with a twist that reflects your unique brand identity. You might use a custom intro or a dynamic split-screen layout. The goal is to create a narrative that captures and holds attention. When you view our portfolio, you can see how we transform raw visual data into compelling stories that resonate with audiences across various industries.
Mastering Technical Specifications for Large-Scale Teams
For large-scale teams, consistency is the foundation of quality. To ensure that every video looks and sounds the same, it is essential to implement a unified codec standard across your corporate video team. This ensures total compatibility during post-production and prevents the technical headaches that arise when mixing different file types. Furthermore, establishing a central repository for high-bitrate master files is often cited as a critical step by production studios that handle high volumes of raw media. It prevents the loss of visual quality that occurs when files are compressed and shared multiple times over email or chat apps.
To keep these technical processes running smoothly, many professional teams use specialized workflow management tools to streamline their project administration. Beyond the administrative side, having a clear set of standards for resolution, frame rate, and audio levels ensures that every capture is usable for high-end outputs. At Pretzel Logic, we help brands navigate these complex requirements, moving their vision from concept to screen through meticulous planning and pre-production. Our focus is on ensuring that the technical backbone of your project is strong enough to support the most ambitious creative goals.
Refining Your Visual Strategy with Expert Editing
The final stage of a professional screen capture strategy is the refinement process. You can significantly elevate your captures by integrating them with professional motion graphics to explain complex data points effectively. Often, a screen recording on its own can feel static. Adding animated highlights or 3D callouts can bring the information to life. For brands with a library of existing content, leveraging comprehensive post-production services can revitalize footage that may feel dated or uninspired, bringing it up to modern standards without the need for a full re-record.
Ensuring your final export meets the technical standards required for nationwide commercial campaigns is a task that requires an expert eye. From broadcast-safe colors to loudness-normalized audio, the details matter. You can learn about our team to understand how we approach these final polishes, ensuring every asset we touch is ready for the highest level of distribution. By exploring a wide range of inspiring visual stories, you can see how professional editing transforms simple recordings into powerful marketing assets that drive real engagement and tell a brand’s story with clarity and impact.
Navigating the world of high-end video production requires a partner who understands both the technical nuances of software and the creative requirements of storytelling. If you are ready to take your visual content to the next level, contact our team to discuss how we can bring your next project to life with precision and style.
FAQ

Q: What is the best resolution for screen capture? A: Always record in your monitor’s native resolution, typically 1080p or 4K. If the UI appears too small, increase your operating system’s display scaling rather than lowering the capture resolution.
Q: How do I avoid "laggy" screen recordings? A: Use software that supports hardware acceleration (GPU encoding). Close unnecessary background applications and ensure you are recording to a fast SSD rather than an external HDD.
Q: Can I record multiple windows at once? A: Yes, tools like OBS Studio allow you to create "scenes" where multiple windows, webcam feeds, and static images are layered into a single frame.
Q: Is there a way to record audio from two different sources? A: Most professional screen capture tools support multi-track audio recording. This allows you to keep your microphone and system audio on separate tracks for easier editing later.
Q: How can I make my cursor more visible in tutorials? A: Look for features like "cursor highlighting" or "mouse-click effects" in your software settings. This adds visual cues like rings or highlights every time you click.