
Last updated September 13, 2026
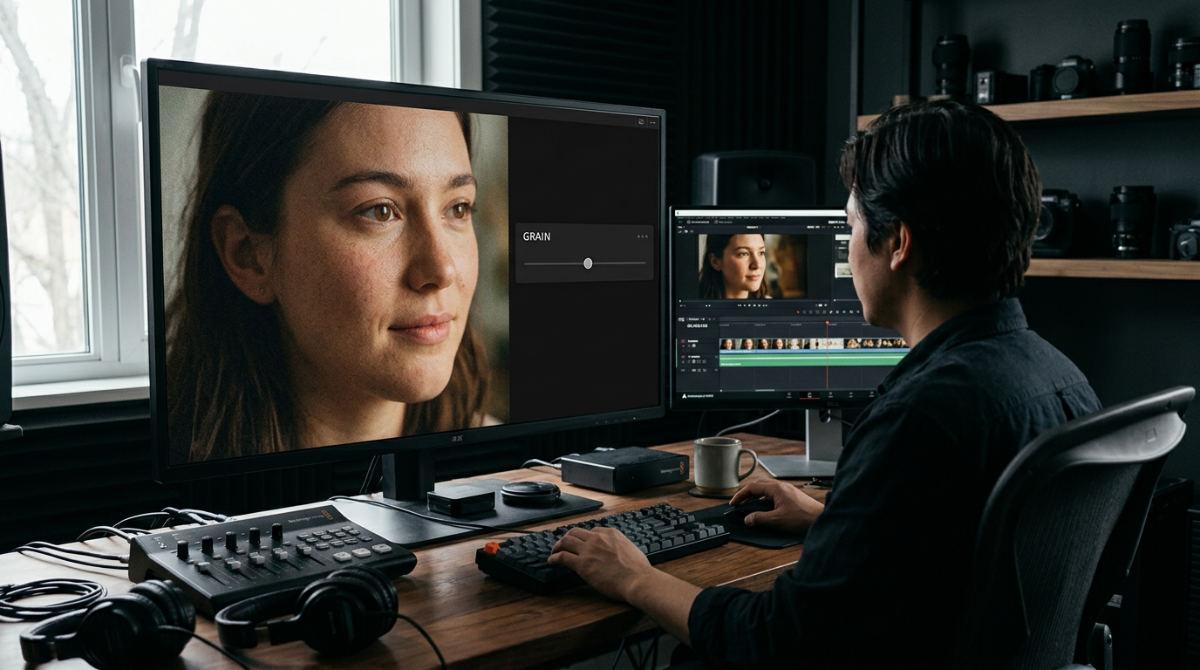
Integrating a film grain overlay is more than a vintage trend. It is a practical technique for masking digital compression and adding organic life to sharp sensors. Based on industry standards, this guide explores how to balance grit with clarity for professional results.
Key Takeaways
- Hide Artifacts: Use grain to mask H.265 compression and digital banding in gradients.
- Target Mid-tones: Keep shadows clean by focusing grain density where silver halide crystals are most active.
- Match Formats: Use 35mm for polished commercials and 8mm or 16mm for raw, nostalgic storytelling.
- Blend Correctly: Stick to Overlay or Soft Light modes to ensure the texture interacts with the underlying luminance.
- Final Step: Always apply grain after the final color grade to avoid distorting the texture.
1. Use film grain to mask compression artifacts and digital banding.
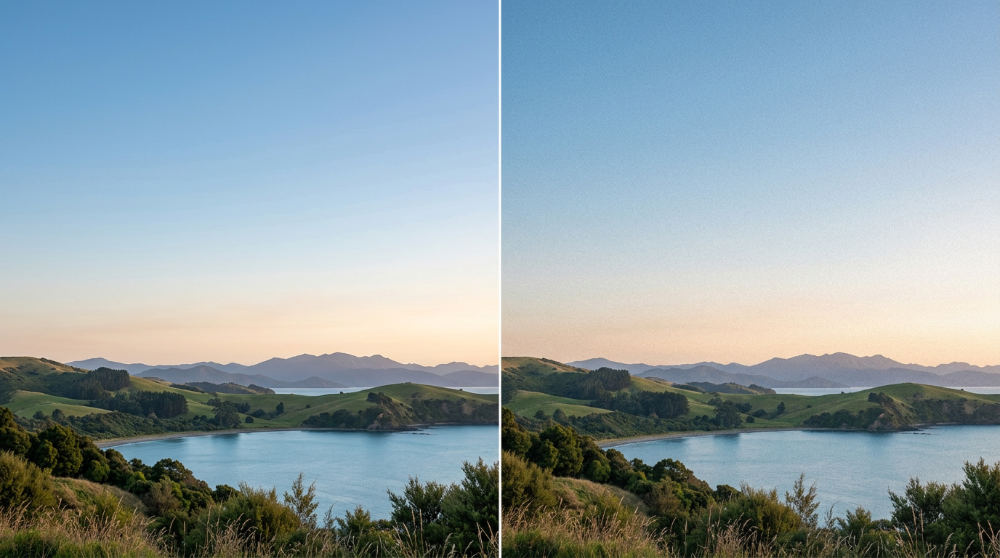
Film grain functions as a dithered signal that breaks up the visible blocks and color banding caused by aggressive digital compression. When footage is heavily compressed, smooth gradients like blue skies or shadows often suffer from "contouring." By adding a subtle layer of moving grain, you provide the viewer’s eye with a randomized texture that masks these static errors. This technique effectively distracts the brain from noticing the limitations of the H.265 codec. It makes a mid-range camera look like a high-end cinema system. Modern prosumer cameras often use the H.265 codec, which struggles to retain natural texture.
High-efficiency compression tends to smooth out fine details. It leaves behind blocky artifacts or unsightly banding in gradients like clear skies. By applying a film grain overlay at a low intensity, you introduce a dithered digital signal. This moving texture prevents the eye from catching static pixel blocks. It hides codec limitations. Apply the grain specifically to areas where the signal feels "plastic" or over-processed. The result is a cohesive image that looks like it was captured on a much higher-end sensor. Instead of a digital error in a sunset, the viewer sees a textured, cinematic sky that feels intentional.
2. Apply a ‘film print’ workflow by scanning digital footage back to film.
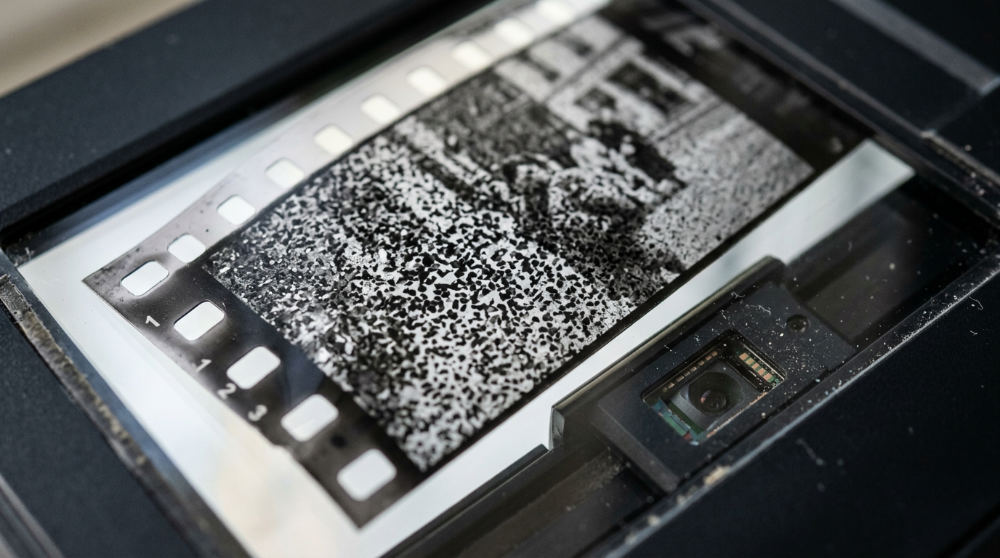
A professional film print workflow treats the grain as a physical property. It is not a filter. This process mimics the historical method where digital files are recorded back onto negative stock and then scanned again to capture the chemical texture. To achieve a truly organic look, many high-end productions now mimic the look of traditional film. They film digitally for the convenience and dynamic range, then apply a film emulation process in post to capture the physical imperfections of celluloid.
Pretzel Logic utilizes this in our post-production editing services to ensure the color grading and texture feel unified. We avoid the tacked-on look. Use high-quality greyscale film scan overlays that replicate the random grain distribution of real stock. When the grain is integrated into the color science, the final product avoids the "filter" look and feels like a physical medium. This approach bridges the gap between clinical 4K sharpness and the emotive quality of a traditional film print. The marriage of modern resolution and classic texture creates a superior viewing experience for modern audiences.
3. Prioritize grain density in the mid-tones for a realistic look.
Authentic film grain is mathematically denser in the mid-tones. It is nearly invisible in the extreme shadows or highlights because of how silver halide crystals react to light. If you apply grain uniformly, it looks artificial and flat. It resembles digital sensor noise rather than organic emulsion. To achieve realism, you must use a luma key or a grain tool that allows you to isolate the intensity based on luminance values. This ensures that the deep blacks remain clean and the bright highlights do not look "dirty" or muddy.
A common mistake is applying grain evenly across the entire image. Real film emulsion behaves differently depending on exposure. Film grain is typically most prominent in the mid-tones and less visible in deep blacks or bright whites. When applying textures, adjust overlay settings to mimic this behavior. For a more traditional film look, grain intensity can be varied across color channels to better replicate specific chemical film stocks. Avoid heavy grain in deep shadows. This often mimics sensor noise rather than beautiful emulsion.
4. Select 35mm grain for a subtle, high-end cinematic polish.
When a project requires a premium feel rather than an overt vintage aesthetic, 35mm plates are the gold standard. These overlays provide a fine, tight grain structure that adds depth without distracting from the subject. This works well for commercial or corporate projects where you want to signal high production value without making the footage look "old." Ensure your chosen plate is a high-resolution film scan to maintain clarity.
When we handle corporate films production for brands, we often opt for 35mm grain to soften the digital edge of modern cinema cameras. The result is a sophisticated texture that makes the footage feel more expensive. It gives the brand a "big screen" presence. The 35mm format is characterized by its high resolution and subtle grit. It is ideal for interviews and product showcases. It provides the "film look" that viewers associate with major motion pictures while maintaining the sharpness expected by modern corporate clients and marketing directors.
5. Set your blend mode to Overlay or Soft Light for seamless integration.
How you layer your film grain overlay in your NLE determines whether it looks like a natural part of the image or a cheap mask. Place your grain scan on a layer directly above your footage in Premiere Pro, Final Cut, or DaVinci Resolve. For the most realistic result, change the composite or blending mode to Overlay. This affects both highlights and shadows, creating a balanced texture. If Overlay is too aggressive and crushes contrast, switch to Soft Light for a more delicate touch.
It is generally recommended to use Screen mode only if you are working with a specific "dirt and scratches" plate that has a pure black background. By sticking to Overlay or Soft Light, the grain interacts with the underlying colors and luminance. This creates a believable depth. This interaction is key because it makes the grain look as if it is inside the image rather than sitting on the surface. Professionals always check the histogram after applying these blend modes to ensure the black levels haven’t shifted significantly during the process.
6. Increase the ‘swimming’ movement of grain to make static shots feel alive.
Digital images often feel "dead" because the pixels are static and perfectly aligned. In contrast, real film is a living medium. Light hits physical silver halide crystals in a slightly different position on every frame. To replicate this, you must ensure your film grain overlay has enough "swimming" movement. Even in a still-life shot or a locked-off interview, the grain should be constantly shifting to provide a tactile, breathing quality.
Moving textures help prevent the brain from identifying a pattern as a static digital overlay. High movement creates a subconscious sense of energy and realism. This technique is especially useful in efficient short film video production to keep the audience engaged during slower scenes. The visual texture does the heavy lifting. When grain "swims," it gives the footage an organic pulse, making even the most sterile digital environment feel like it was captured on a physical medium with history and character.
7. Use dedicated plugins for fine-tuned control over grain size and softness.
While high-quality scans are excellent, sometimes you need the granular control only a dedicated plugin provides. Tools like Dehancer, Film Convert, or Filmbox offer algorithms that generate grain based on the specific luminance and color data of your shot. Utilizing professional-grade grain tools in software like DaVinci Resolve Studio offers a robust alternative to basic PNG or MOV overlays.
These tools allow you to adjust "softness" and "size" parameters to match the specific resolution and focal length of your footage. A wide-angle shot might require smaller, sharper grain. A close-up with shallow depth of field looks better with a softer grain profile. This level of precision ensures the grain matches the optical characteristics of the lens used. For example, a vintage lens scan should have softer grain than a modern Master Prime. Agencies that manage these technical choices ensure the visual strategy remains consistent across all platforms.
8. Adjust opacity and contrast to balance the grain against the image.
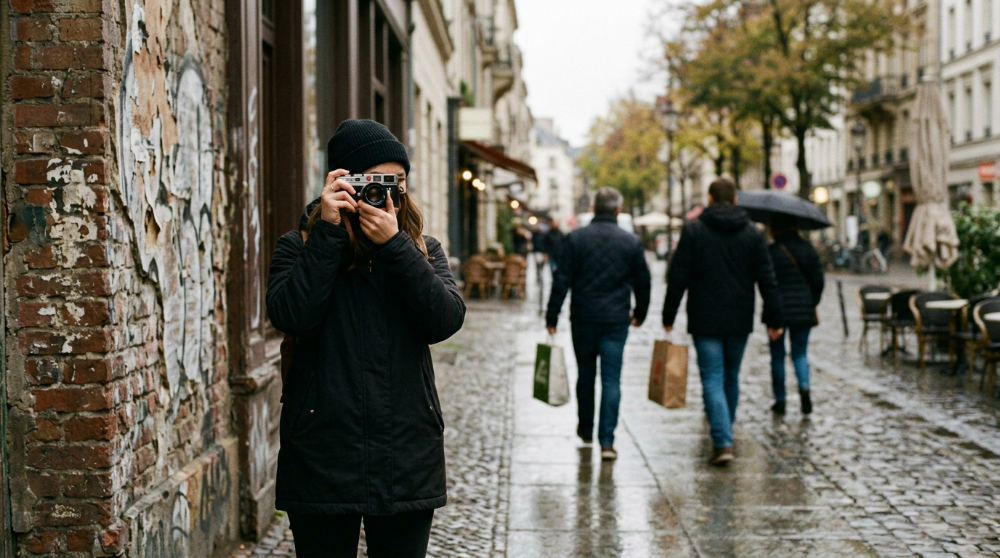
Achieving a natural look requires fine-tuning the intensity of your grain plate. If the texture feels too sharp or "sandy," especially against human faces, lower the opacity of the grain layer. This softens the effect and prevents it from looking like digital noise. Conversely, you can boost the contrast of the grain plate itself before blending it with your footage. Adjusting the contrast of the overlay can make the texture appear more distinct in the mid-tones, where it is most naturally observed.
Visual consistency acts as a glue for your edit. If one shot is heavily textured while the next is clean, the illusion of shooting on film is shattered. Ensure the grain settings, size, and intensity match across every video in a series. This builds a cohesive brand identity that feels intentional. By carefully balancing these levels, you ensure the grain enhances the story rather than distracting from it. Always perform a final pass on a calibrated monitor to ensure the texture doesn’t become overwhelming in darker viewing environments like a cinema or home theater.
9. Deploy 8mm or 16mm grain for specific nostalgic and grit-heavy storytelling.
Choosing the right format depends entirely on the emotional tone. While 35mm is the standard for high-end polish, 16mm grain offers a gritty, indie drama aesthetic with significantly more visible texture. If the goal is a heavy vintage or home-movie homage, 8mm overlays provide a dense, chunky grain that immediately signals nostalgia. This is particularly useful for sequences that need to feel intimate or historically grounded.
To enhance a retro effect, these larger grain structures can be paired with softer focus or slightly lower resolutions. Using these formats correctly requires a bold approach to texture. Allow the grit to become a central part of the visual language. This is particularly effective for dream sequences or memory-based narratives where the technical imperfections serve the emotional arc of the story. The 16mm look is currently trending in fashion and music videos for its raw, unfiltered energy that contrasts with modern digital perfection.
10. Layer dust and scratches for an authentic vintage ‘wear’ effect.
To move beyond just a texture, layer a secondary "dirt" plate over your standard grain. This involves adding dust, hair, and vertical scratches that mimic aged, handled film stock. These elements shouldn’t be constant. They should appear sporadically to simulate the passage of time or the physical wear of a projector. By separating your grain layer from your dirt layer, you maintain control over the intensity of each element individually.
Adjusting the opacity of the dust layer independently prevents it from overwhelming the footage. Target specific scenes for these effects (like a character looking through old photos or a historical flashback) to denote a change in time. When used sparingly, these imperfections add a layer of "truth" that makes the viewer feel they are watching a rediscovered piece of history. This technique is often used in title sequences to establish a specific period setting before transitioning into a cleaner, modern look for the main narrative.
11. Loop your grain overlays to cover long-form video content.
Most high-quality grain scans are only 10 to 30 seconds long. To cover the entire duration of a video, you must loop the grain plate. The simplest way is to copy and paste the grain clip repeatedly on your timeline. This ensures that the texture remains constant throughout the entire presentation, providing a subconscious visual anchor for the audience. Without a proper loop, the sudden disappearance of grain can be jarring to the viewer.
It is important to ensure the grain plate is of sufficient length so that the repetition of the texture does not become obvious to the viewer. If you notice a "jump" at the cut point, try feathering the edges of the loop or using a short cross-dissolve between the grain clips. This creates a continuous, uninterrupted flow of texture. When taking advantage of the diverse environments for San Diego production, maintaining a consistent loop ensures the atmosphere remains unbroken. It works across every scene, from the bright beaches to the historic streets of Old Town.
How to Integrate Grain into Professional Workflows
Applying a film grain overlay should be the final step in your post-production pipeline. Ideally, apply the grain after the final color grade is locked. This prevents color adjustments from distorting the grain’s texture or changing its luminance in an artificial way. If you apply grain before grading, you risk crushing the texture into the shadows or blowing it out in the highlights. This sequential approach ensures that the grain looks like it was baked into the final print.
Be mindful of the technical demands on your hardware. Heavy grain overlays can significantly increase export duration. The computer must calculate millions of shifting particles for every frame. During the editing phase, consider using optimized proxies or keeping the grain layer turned off until you are ready for the final render. This keeps your timeline responsive while you focus on the narrative and short film narration pacing. Modern GPUs are better at handling these overlays, but long-form content still requires significant processing power to render smoothly at 4K.
Maintain a light touch for corporate messaging. While grit works for cinema, excessive grain can obscure facial details and diminish the professional clarity required to build brand trust. In high-contrast environments, digital highlights often look harsh and clinical. A subtle 35mm overlay helps soften these edges, providing a more natural coastal look that feels expensive. This balance is critical for maintaining high-quality standards while achieving the desired emotional impact of the film look.
Measuring the Impact of Cinematic Textures
The aesthetic quality of your video often correlates directly with higher viewer engagement. Audiences are conditioned to perceive "cinematic" content as more trustworthy and premium compared to flat, digital-looking footage. By adding texture, you improve the perceived production value. This can keep viewers watching for longer. This psychological effect is powerful; viewers often describe textured footage as feeling "more real" or "higher quality" even if they cannot explicitly identify the presence of grain.
For brands, this translates to better marketing performance. Track viewer retention rates on videos with and without texture to see how these subtle visual choices impact your specific demographic. When companies are ready to tell their story, our corporate video production guide details how these specific visual choices drive tangible results and brand recall. By investing time in the final polish of your video, you are signaling to your audience that your brand values detail, craftsmanship, and professional excellence. These visual cues build long-term authority in competitive digital marketplaces.
Consistency is paramount. Utilizing a comprehensive visual strategy ensures that the cinematic quality of your videos matches your print and digital advertising. This strategy ensures that every touchpoint a customer has with your brand feels intentional and premium, maximizing the return on your production investment.
Frequently asked questions
How to add film grain overlay in post-production?
Import your grain scan file and place it on a track above your primary footage in your NLE. Set the Blending Mode to ‘Overlay’ or ‘Soft Light’ and adjust the opacity to roughly 30-50% for a subtle effect. Finally, ensure the grain is set to loop if the clip is shorter than your scene. Always place this layer above your color correction but below your final sharpening or watermarks to maintain a realistic look.
Why use film grain for a vintage look?
It mimics the physical chemistry of silver halide crystals found in real celluloid, providing a nostalgic texture digital sensors lack. Grain reduces the clinical, artificial sharpness of modern 4K and 8K cameras while introducing "micro-movements" that make static images feel more alive and organic. By simulating the optical imperfections of the past, creators can evoke specific emotional responses and historical context without shooting on expensive physical stock.
Can film grain fix video compression issues?
Yes, film grain acts as a form of dither that breaks up digital banding and macroblocking. By adding a layer of randomized noise, you mask the static artifacts created by high-efficiency codecs like H.264 or H.265. This technique is widely used by professional colorists to salvage footage shot in low-bitrate environments or to prepare digital content for high-quality streaming where compression might otherwise be visible to the audience.
Does film grain affect video export times?
Adding a film grain overlay significantly increases render and export times because the software must process millions of moving particles for every frame. To speed up your workflow, it is recommended to keep the grain layer disabled while editing and only toggle it on during the final render stage. Using hardware-accelerated plugins can also help mitigate these performance hits, but for high-resolution 4K projects, expect a noticeable increase in processing duration.
Ready to bring your creative vision to life with professional cinematic techniques? Contact Pretzel Logic Productions to get started on your video production journey today.